Transformer
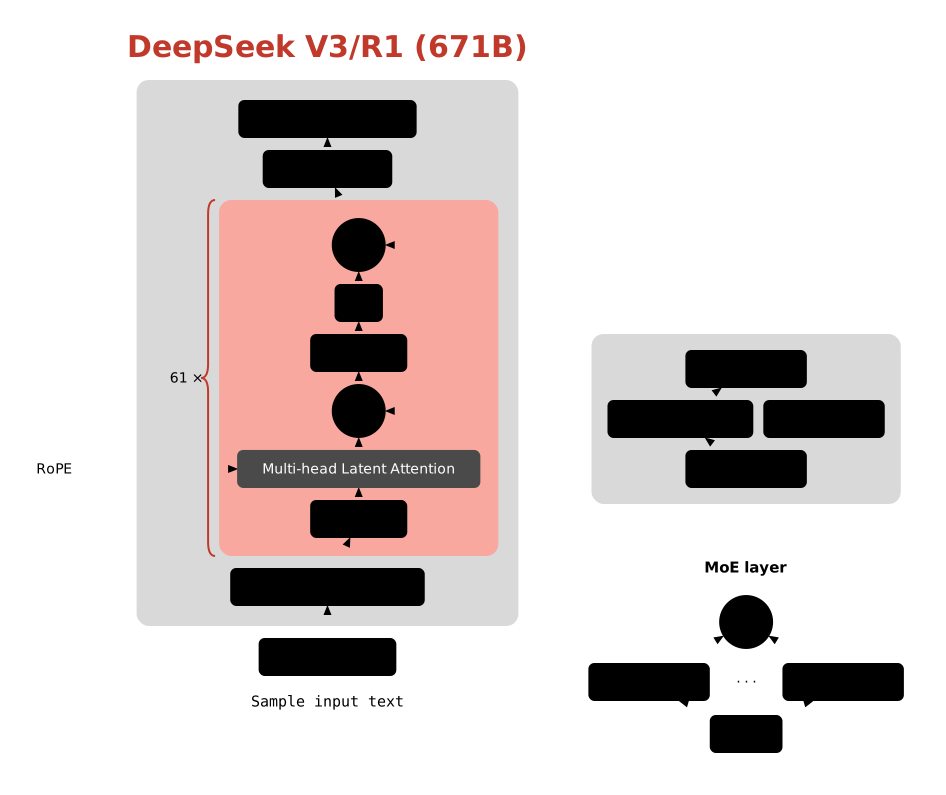
One of the LLM architecture cards from Sebastian Raschka's gallery, which is a good stress test because the whole genre is one picture: a trunk of boxes, a block that repeats, residuals that bypass the block's halves, and modules floated off to the side that expand a box the trunk only names. Nothing here is a diagram type. The trunk is a <column>; the repeated block is a <contains> in a <row> with a <brace>, which takes the block's height from align="stretch" rather than being told it; the residuals are <connect routing="orthogonal"> pinned to the right at both ends; the side modules are ordinary subtrees in a sibling column, tied to what they explain by a dashed <connect> and pulled level with it by <align>. The one thing worth writing down: an aside must not move the thing it annotates. Put the whole trunk in ONE column and the asides beside it, and the trunk stays internally centred however wide the asides get. Hang them off a <row> half way down instead and everything below that row re-centres on the wider canvas, which looks right until you notice the arrow into the first box has gone diagonal.
Result
Source examples/transformer.svgn
<diagram padding="26" theme="light" background="#ffffff">
  <!-- One of the LLM architecture cards from Sebastian Raschka's gallery, which
       is a good stress test because the whole genre is one picture: a trunk of
       boxes, a block that repeats, residuals that bypass the block's halves, and
       modules floated off to the side that expand a box the trunk only names.

       Nothing here is a diagram type. The trunk is a <column>; the repeated
       block is a <contains> in a <row> with a <brace>, which takes the block's
       height from align="stretch" rather than being told it; the residuals are
       <connect routing="orthogonal"> pinned to the right at both ends; the side
       modules are ordinary subtrees in a sibling column, tied to what they
       explain by a dashed <connect> and pulled level with it by <align>.

       The one thing worth writing down: an aside must not move the thing it
       annotates. Put the whole trunk in ONE column and the asides beside it, and
       the trunk stays internally centred however wide the asides get. Hang them
       off a <row> half way down instead and everything below that row re-centres
       on the wider canvas, which looks right until you notice the arrow into the
       first box has gone diagonal. -->
  <style>
    .title  { font-size: 30px; font-weight: 700; fill: #c0392b; }
    .model  { fill: #d9d9d9; stroke: #9a9a9a; }
    .block  { fill: #f9a8a0; stroke: #e2695e; }
    .attn   { fill: #4a4a4a; stroke: #2b2b2b; }
    .side   { fill: #d9d9d9; stroke: #333333; stroke-dasharray: 5 4; }
    .moe    { fill: none;    stroke: #c0392b; stroke-dasharray: 5 4; }
    .tag    { fill: #ffffff; stroke: #333333; }
    .rep    { stroke: #c0392b; stroke-width: 2; fill: #c0392b; font-weight: 700; }
    .lead   { stroke-dasharray: 2 4; }
    .sample { font-family: monospace; font-size: 15px; }
    .cap    { font-weight: 700; font-size: 15px; }
  </style>

  <row gap="54" align="center">
    <rect id="rope" class="tag">RoPE</rect>

    <column gap="12" align="center">
      <text class="title">DeepSeek V3/R1 (671B)</text>

      <contains id="model" class="model" padding="20" gap="12">
        <rect id="linout">Linear output layer</rect>
        <rect id="finaln">Final RMSNorm</rect>

        <row gap="4" align="stretch">
          <brace id="rep" class="rep">61 ×</brace>
          <contains id="block" class="block" padding="18" gap="12">
            <circle id="add2">+</circle>
            <rect id="moe">MoE</rect>
            <rect id="rms2">RMSNorm 2</rect>
            <circle id="add1">+</circle>
            <rect id="mla" class="attn" color="#ffffff">Multi-head Latent Attention</rect>
            <rect id="rms1">RMSNorm 1</rect>
          </contains>
        </row>

        <rect id="tok">Token embedding layer</rect>
      </contains>

      <rect id="txt">Tokenized text</rect>
      <text class="sample">Sample input text</text>
    </column>

    <column id="asides" gap="34" align="center">
      <contains id="ffdetail" class="side" padding="16" gap="12">
        <rect id="d_lin3">Linear layer</rect>
        <row gap="10" align="center">
          <rect id="d_silu">SiLU activation</rect>
          <rect id="d_lin2">Linear layer</rect>
        </row>
        <rect id="d_lin1">Linear layer</rect>
      </contains>

      <contains id="moedetail" class="moe" padding="16" gap="14">
        <text class="cap">MoE layer</text>
        <circle id="m_add">+</circle>
        <row gap="16" align="center">
          <rect id="m_e1">Feed forward</rect>
          <text>· · ·</text>
          <rect id="m_e2">Feed forward</rect>
        </row>
        <rect id="m_router">Router</rect>
      </contains>
    </column>
  </row>

  <connect from="txt"    to="tok"/>
  <connect from="tok"    to="rms1"/>
  <connect from="rms1"   to="mla"/>
  <connect from="mla"    to="add1"/>
  <connect from="add1"   to="rms2"/>
  <connect from="rms2"   to="moe"/>
  <connect from="moe"    to="add2"/>
  <connect from="add2"   to="finaln"/>
  <connect from="finaln" to="linout"/>

  <connect from="rms1" to="add1" routing="orthogonal" from-anchor="right" to-anchor="right"/>
  <connect from="rms2" to="add2" routing="orthogonal" from-anchor="right" to-anchor="right"/>
  <connect from="rope" to="mla" from-anchor="right" to-anchor="left"/>

  <connect from="d_lin1"   to="d_silu"/>
  <connect from="d_silu"   to="d_lin3"/>
  <connect from="m_router" to="m_e1"/>
  <connect from="m_router" to="m_e2"/>
  <connect from="m_e1"     to="m_add"/>
  <connect from="m_e2"     to="m_add"/>

  <connect from="moe" to="ffdetail"  class="lead" arrow="none" from-anchor="right" to-anchor="left"/>
  <connect from="moe" to="moedetail" class="lead" arrow="none" from-anchor="right" to-anchor="left"/>

  <!-- The first id is the anchor and the rest move to it, so these read
       "put rope level with the attention box" and "start the aside column
       level with RMSNorm 2". Naming the COLUMN rather than one of its
       modules is what makes it travel as a unit. -->
  <align of="mla rope" edge="center-y"/>
  <align of="rms2 asides" edge="top"/>
</diagram>